October 4th we locked up our doors, stopped our mail, loaded up the car, and took off for the WHOLE month of October (2015). Can’t say we’ve ever done that before.
Vacation? No. (I wish.)
Believe it or not, it was for construction on ANOTHER log cabin! (If any picture doesn’t appear, just click on it, and it’ll open. If you just stumbled across this post, and haven’t seen our blog before, then I encourage you to read “What is Cottonwood Creek?” or “What is this blog about?” I thoroughly explain the purpose of this blog in each those, and show pictures. It’s not like other blogs; it reads like a chapter book. We’ve been read in over 100 countries! Enjoy our story….)
This post is NOT about our log home. This post is about our family vacation home in New Mexico.
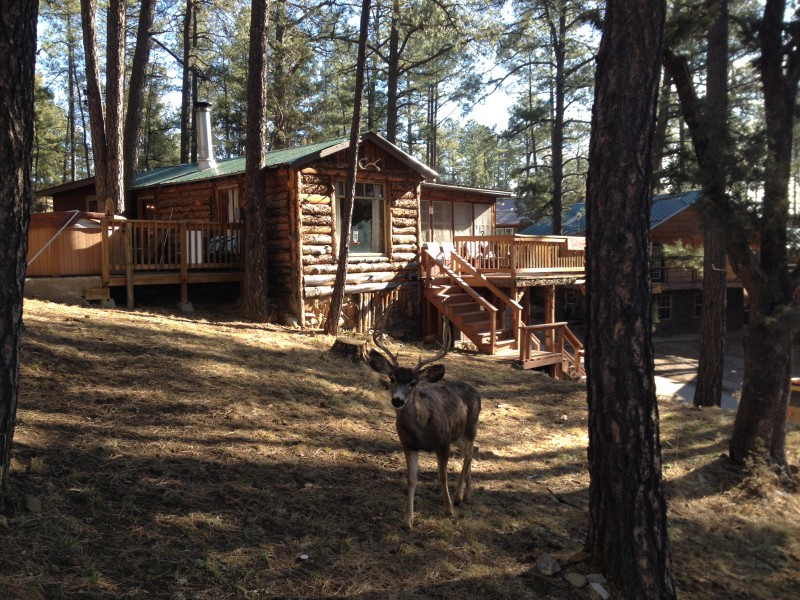
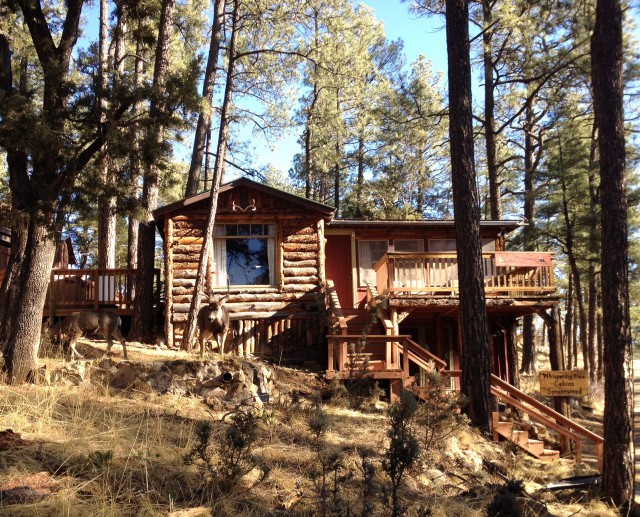
Back in 2004 we bought a cabin in Ruidoso, New Mexico. We’ve rented it out for nightly rentals ever since. (In fact, YOU are welcome to stay in it.) Our youngest daughter was 6 months old at the time we bought it…

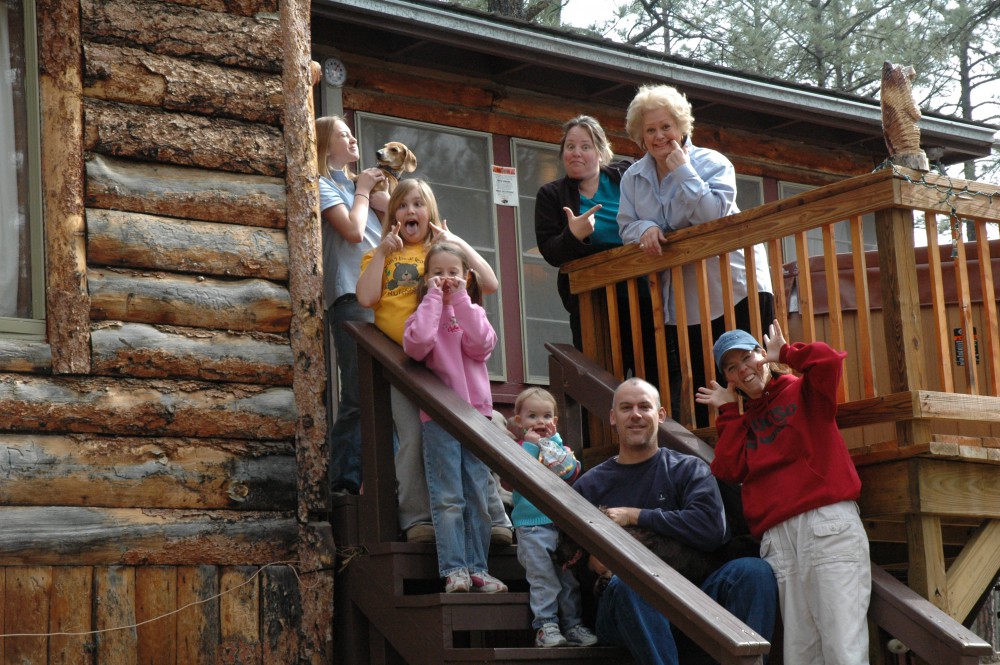
So far, we’ve had 12 years of unforgettable memories sharing the cabin with both of our families, and our friends….


The cabin was built around 1940. Over the years, the living room floor has sloped between 2-5” from one wall to another. The kitchen counters and cabinets were not only dated, but didn’t close. Water was seeping in through the baseboards in the dining room, causing the flooring to be spongy….and more.
It had come time to put our lives on hold and love on the cabin a bit. She’s been faithful to give us rest over the years, and now the Old Girl needed a month at the salon. (Gee…that sounds nice, doesn’t it? I’d kinda like one too….)
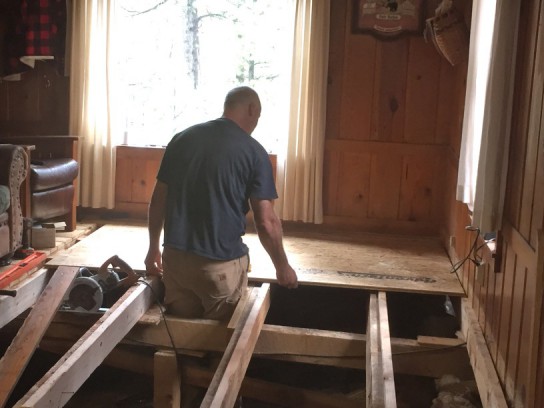
The “game plan” was to gut the kitchen, and remove ALL flooring from living room, dining room, and kitchen. Then level the floor, and rebuild. Ready to see what happened?? (oooh my.)
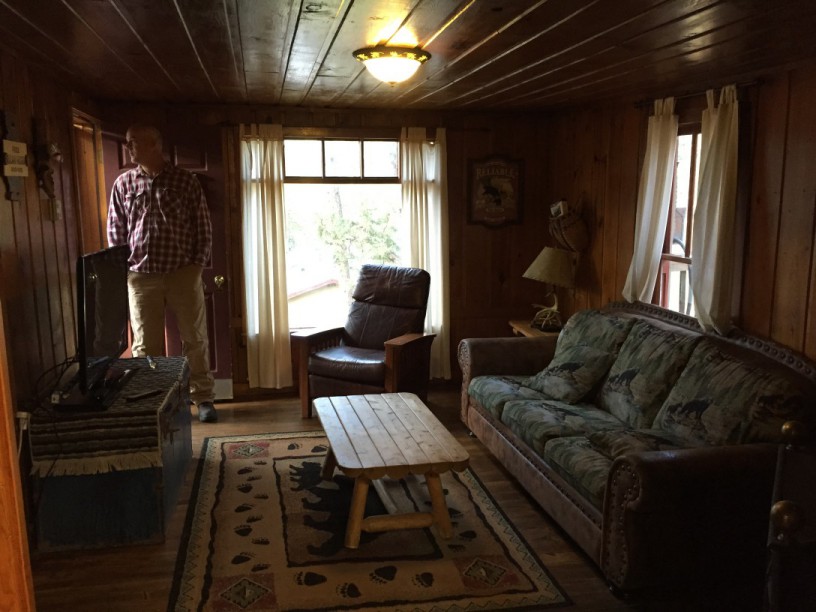
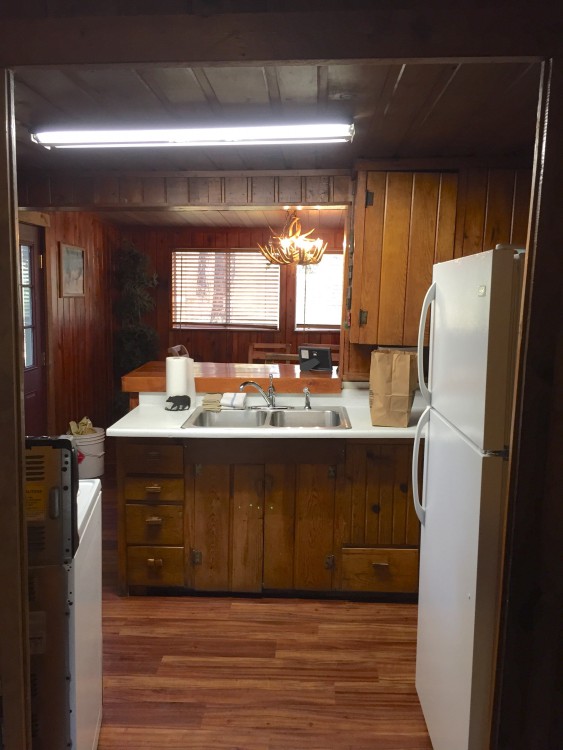
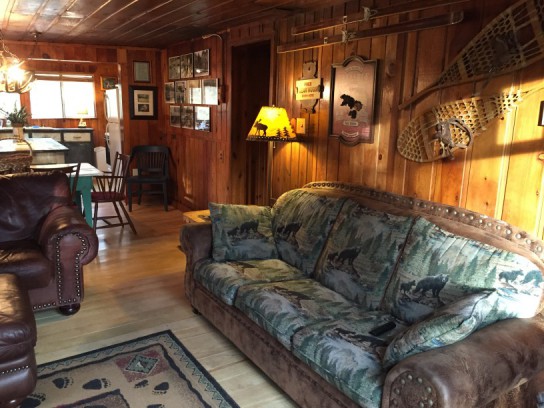
Here’s a tour of “before”.
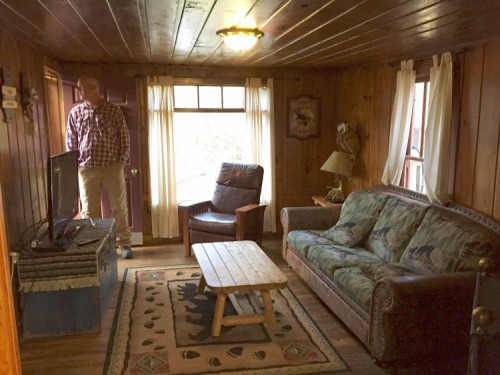
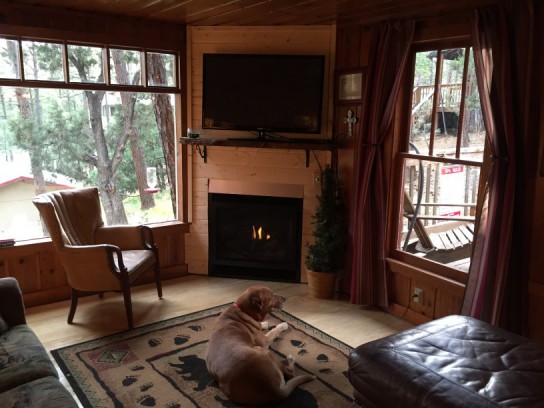
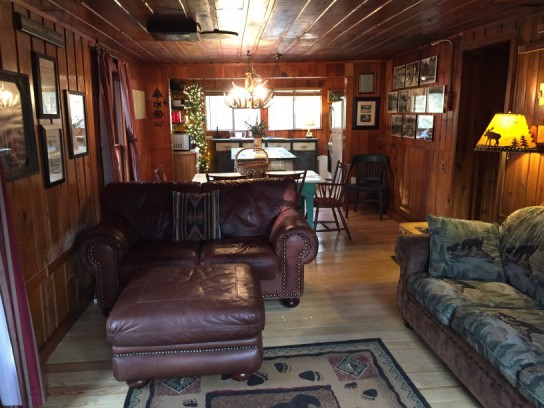
Our living room….
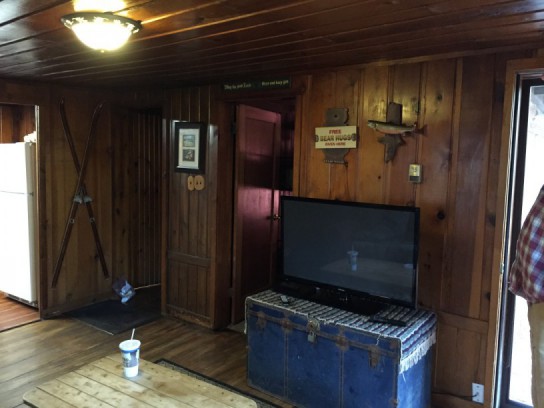
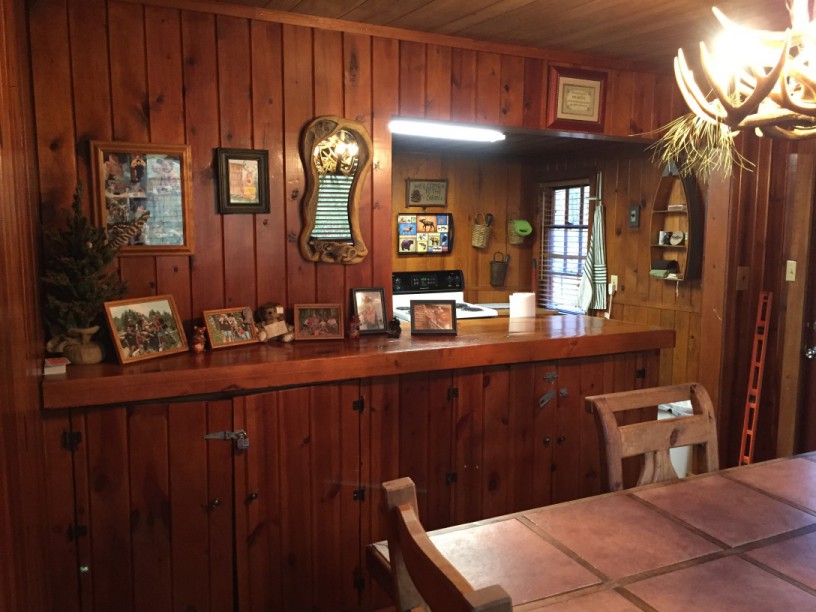
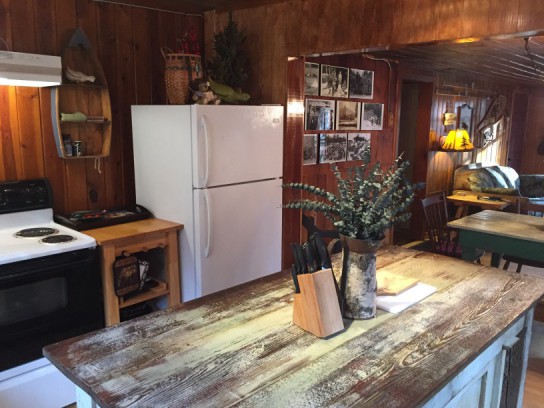
View of kitchen from living room (you can see the counter sloping to the left)…
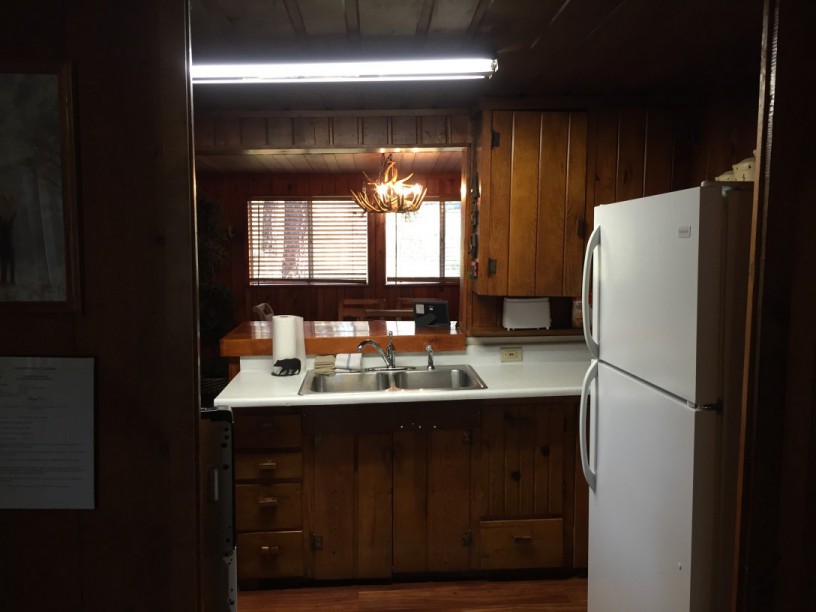
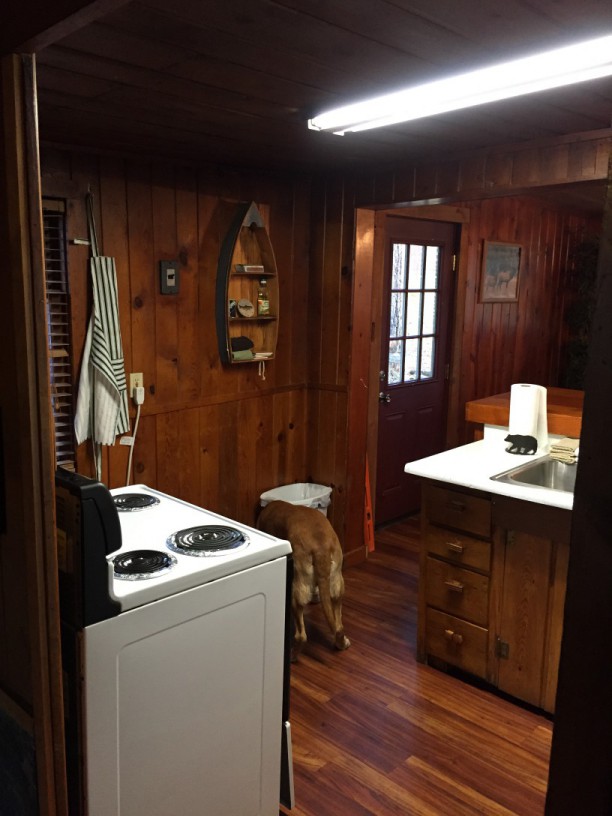
kitchen…

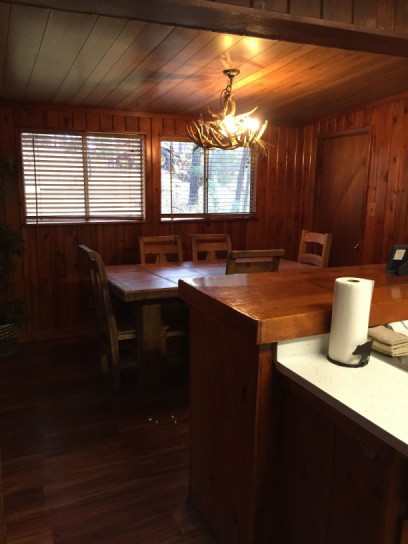
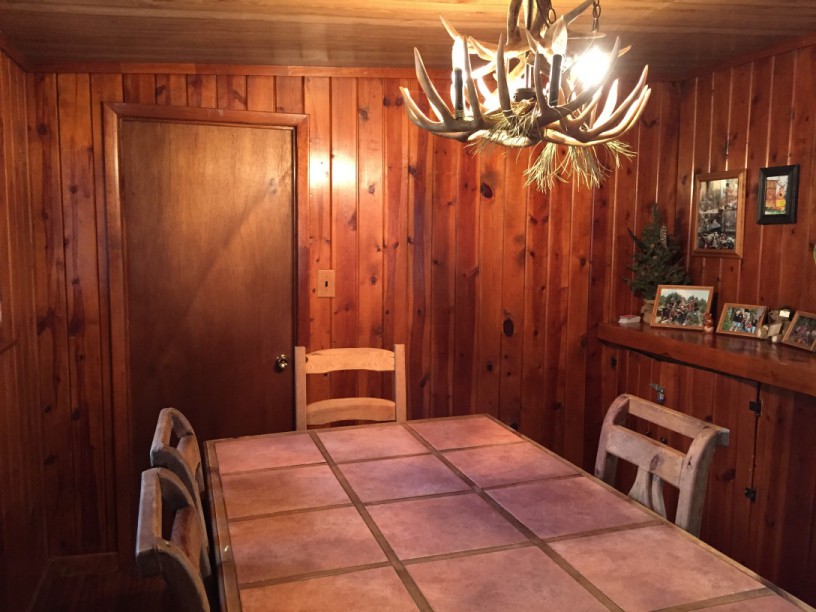
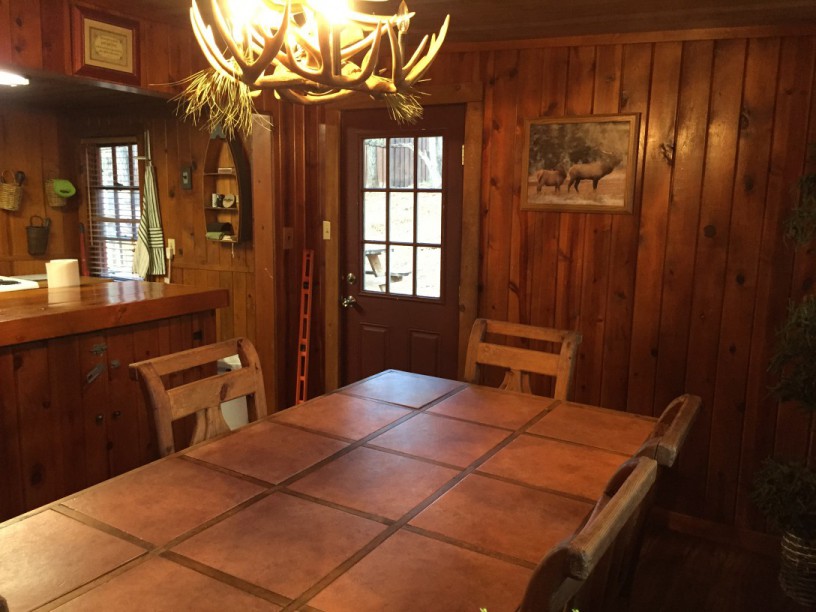
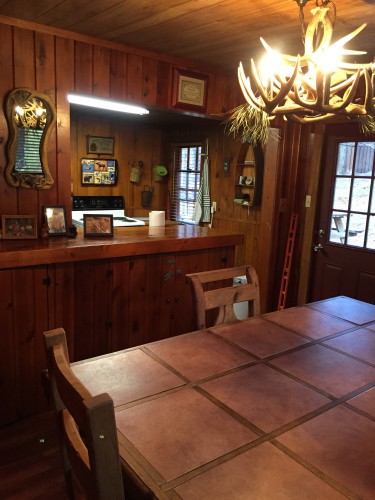
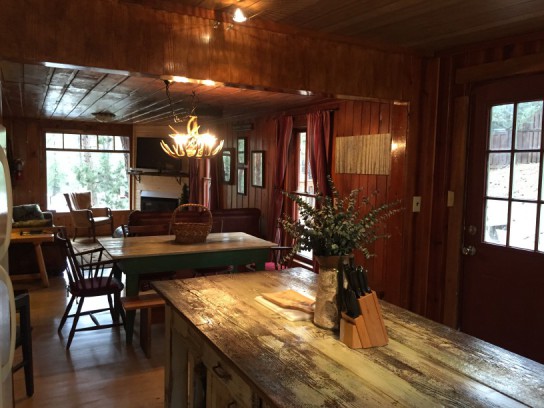
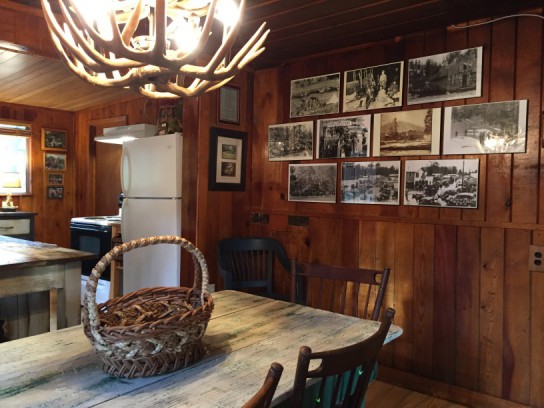
view of dining room from kitchen…
First things first…
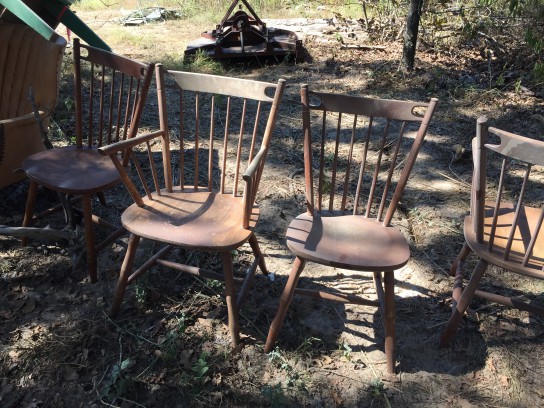
Before heading to the cabin we went to the local auction, and to a traveling flea market. With great bargains in hand (like a $20 porcelain-covered iron sink, $20 farmhouse dining table, $25 for All chairs, a $60 leather chair, $500 for leather couch AND ottoman together, etc…) we were ready for RENOVATIONS. Cheaper than Home Depot! It all just needed a little elbow grease.


this white thing will be our kitchen island….
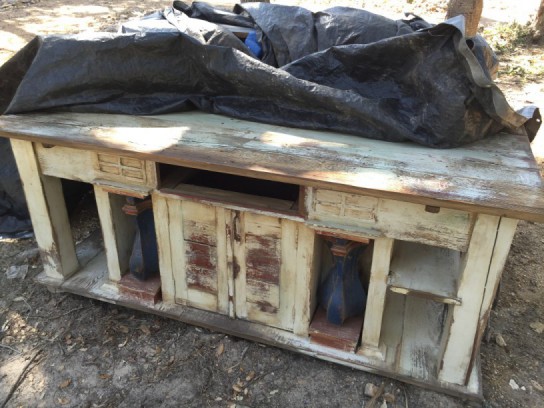
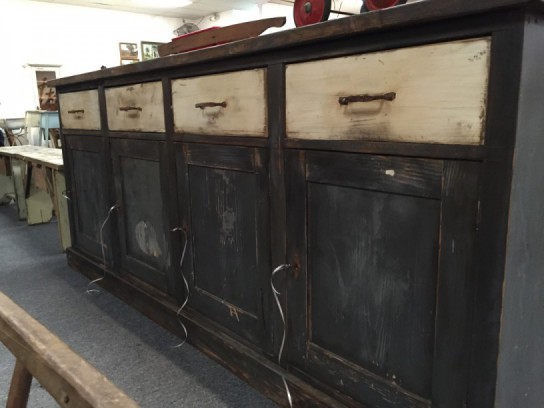
This old shop front desk counter will be our kitchen cabinets with sink in it….
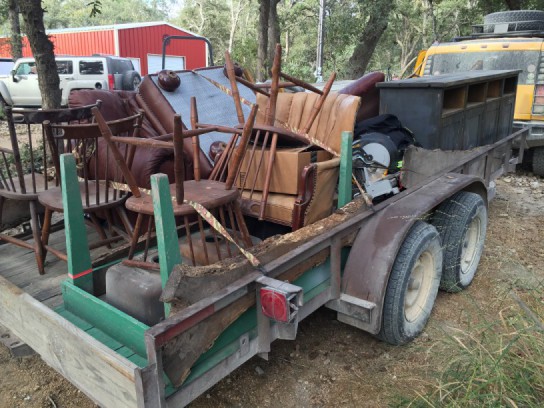
We loaded up the trailer, and off we went from Texas to New Mexico.
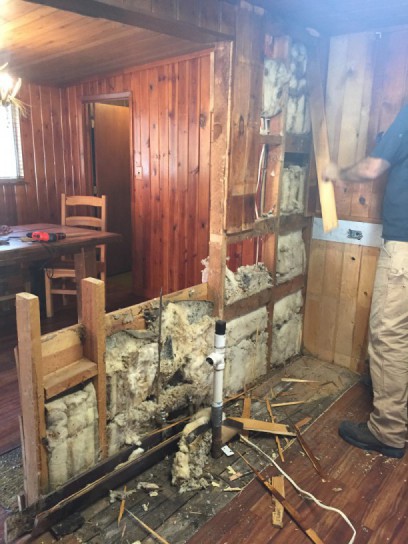
I have to confess… I wasn’t anticipating the tears involved with watching Steve rip apart the kitchen and walls. At first the girls and I just stood… tears running down our faces, watching the startling transformation….
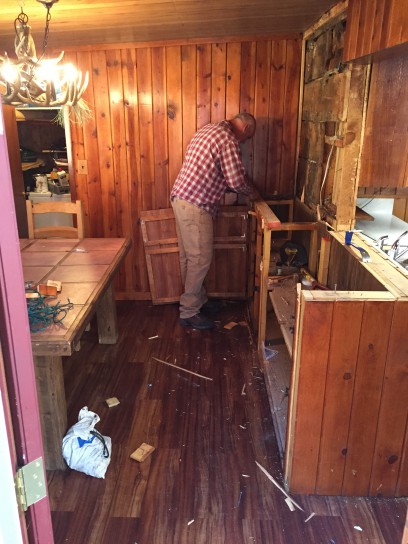
…but we finally started clearing out the wood, and actively got into Operation Renovation mode.

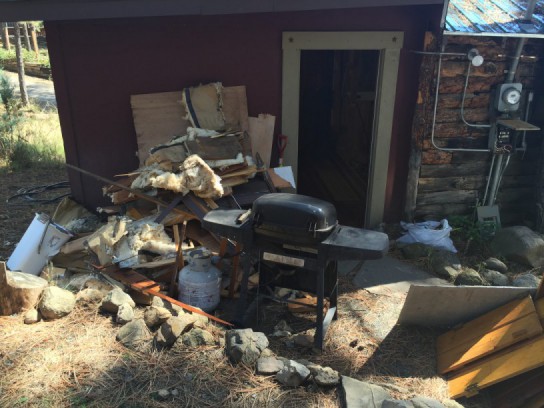
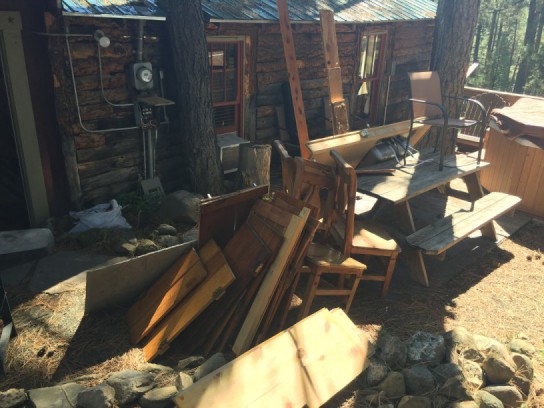
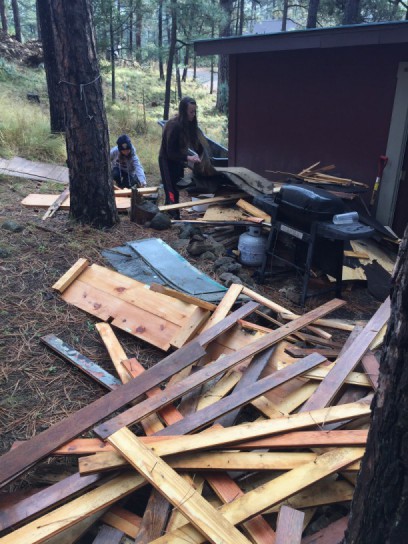
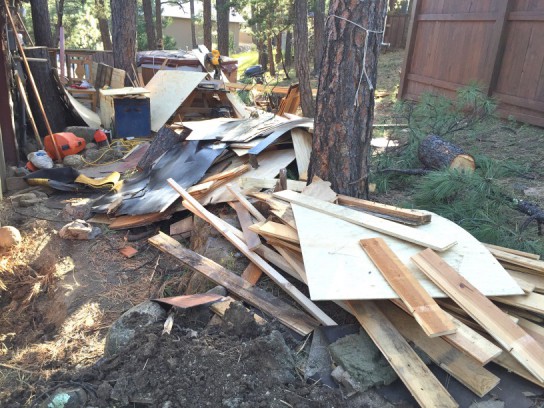
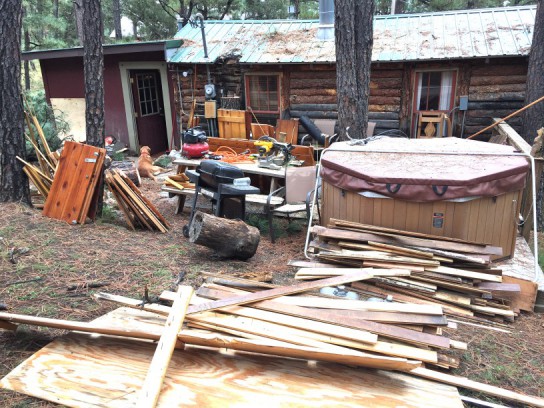
 The mess and chaos wasn’t just inside. The piles of trash outside grew and grew the further we progressed. Here was “before”, and then it only got worse for a whole month…
This was just after the first few hours!
Now you see the fireplace and wall…
 Now you don’t…


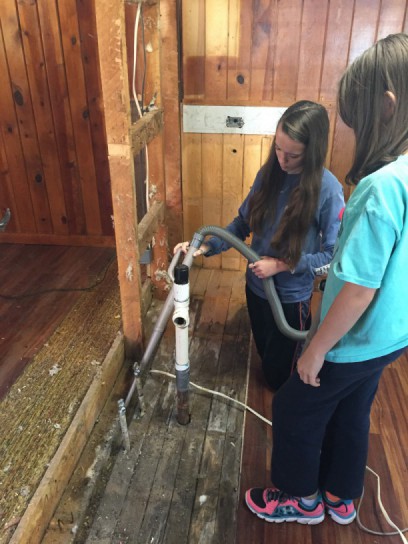
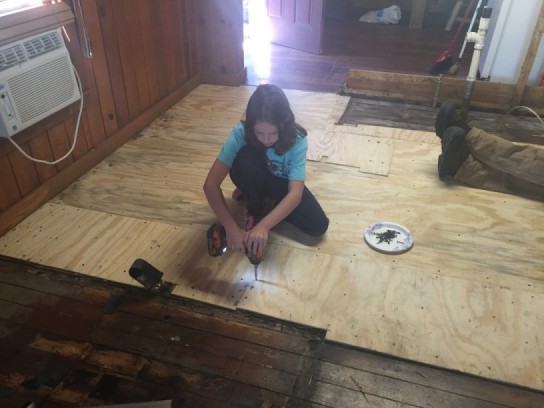
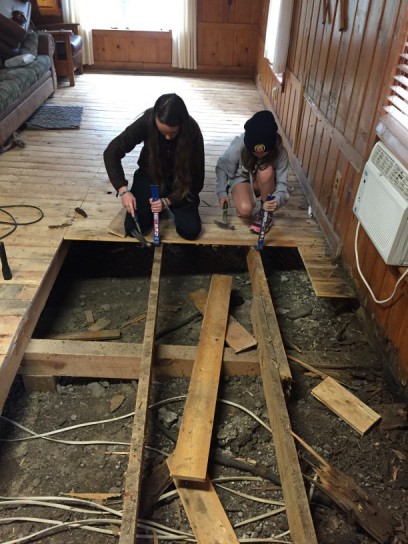
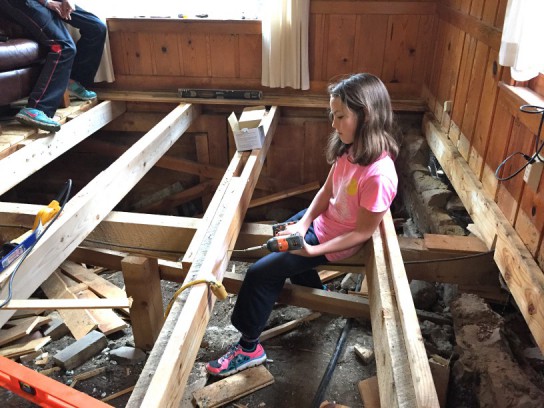
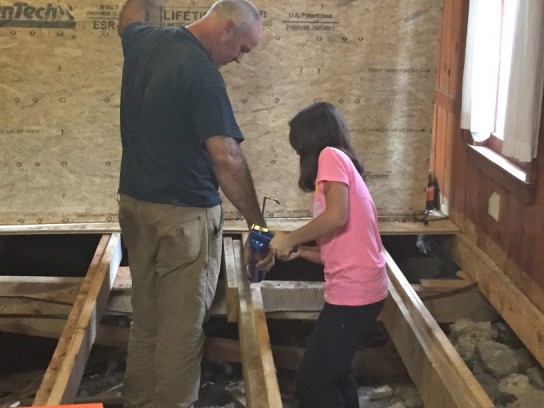
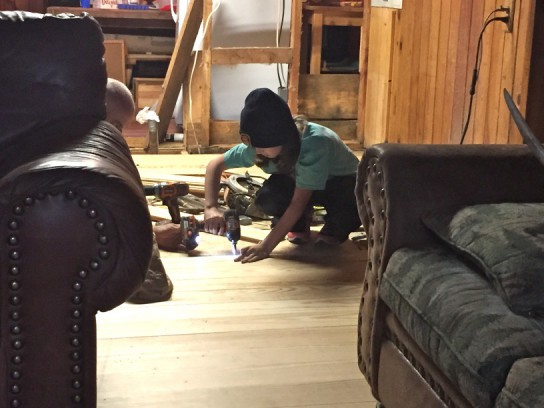
Here, Reese is using the drill to remove TONS of screws from the old flooring. (For the first few days we were there, the girls helped the whole time. Then they schooled every day in their bedroom, and helped us when done for the day.)
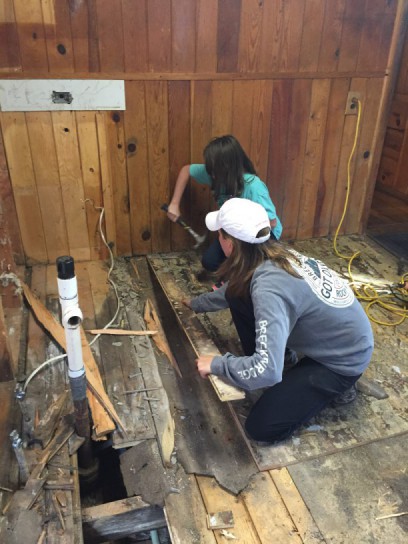
That’s when we said, “Girls! Take all of this trash to the dumpster, and cash will hit your palm at the end of the day.” BINGO!
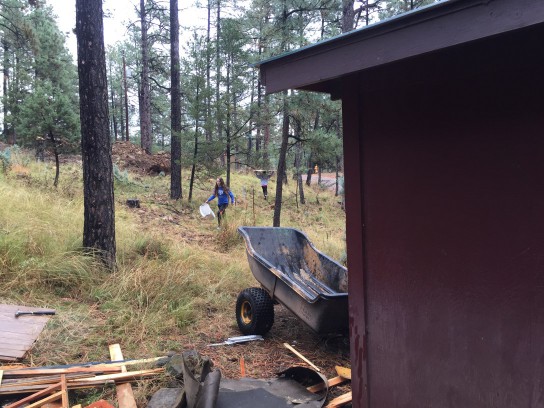
Load #1.
The dumpster is all the way across the lot, behind those large dirt piles.
Bear in mind…we were LIVING IN this cabin for the whole month, while it was all torn up and had no floor.
Along with leveling, we also had a tree growing against the house.

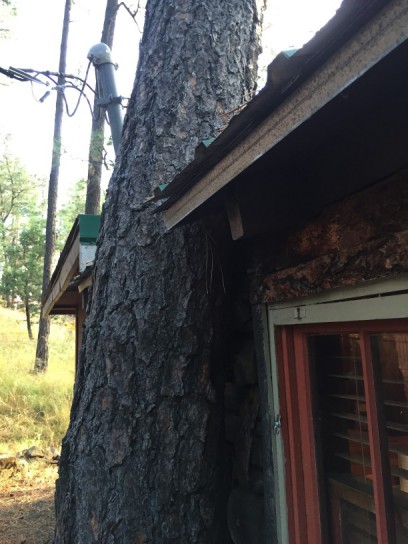
It needed to be removed in the midst of all of this, because we couldn’t jack up the house with the tree pushing down on it. We prayed as a family that God please continue to be in control of the whole construction process. Later that day the tree man came to cut down the huge pine.
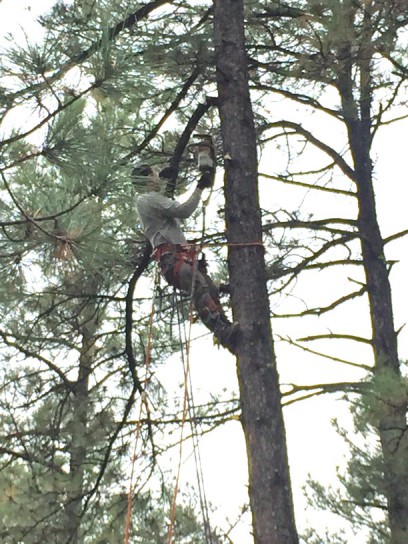
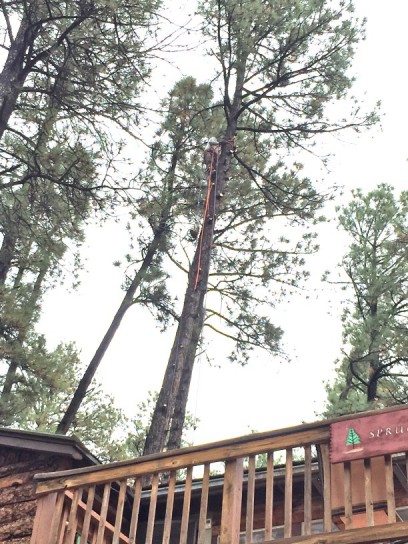
(He’s up that middle tree. Maybe you can see the orange rope dangling.)

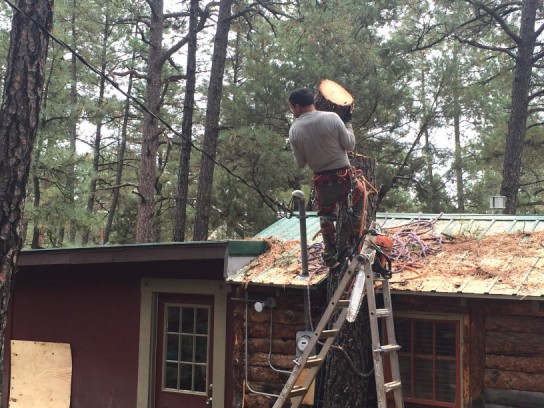
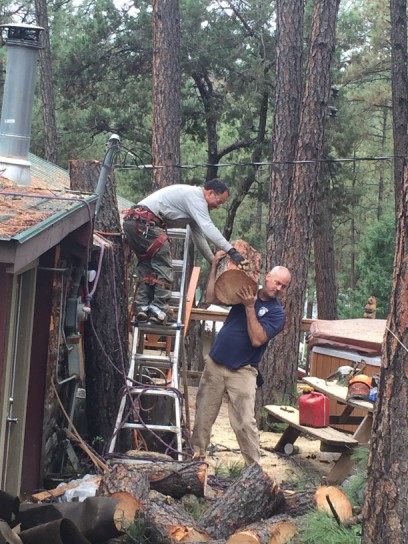
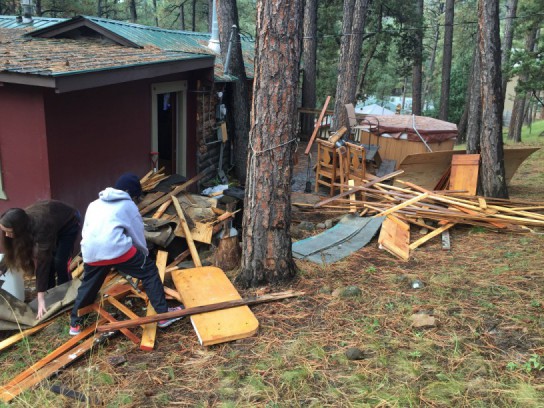
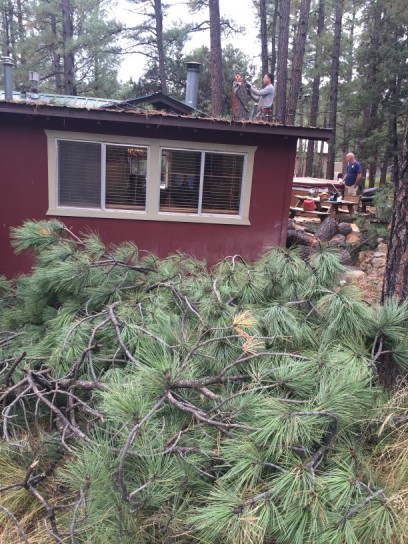
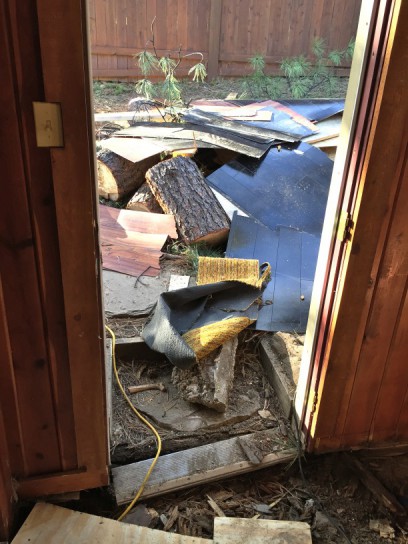
Within 2-3 hours he had the whole thing down… and our yard mess multiplied. That’s a LOT of trips back and forth to the street, uphill and downhill.
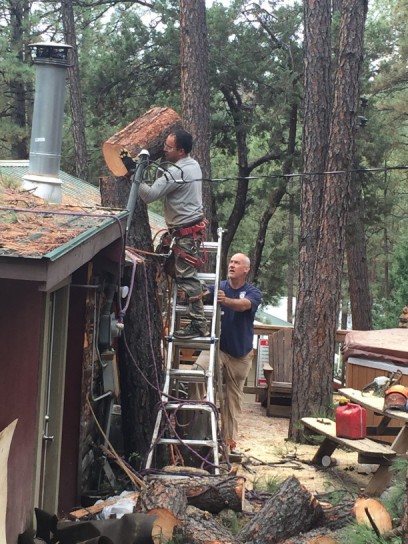
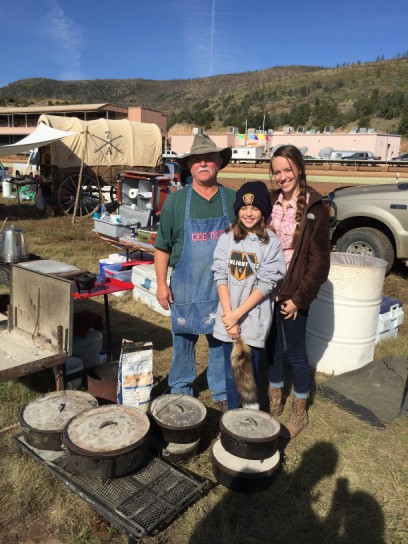
Steve was going to write him a check and asked what his name was. His answer…”Jesus.” I, of course, couldn’t resist a photo-op with JESUS! (wink wink)
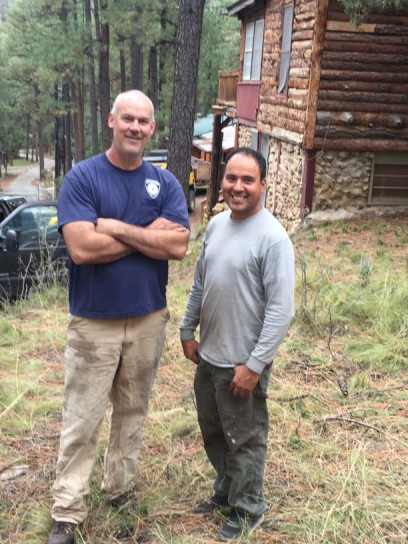
Call me crazy, but to me, that was another God-wink. I LOVE looking for “God-winks”. It’s like an Easter egg hunt each day….paying active attention for His blessings, gentle nudges, and various ways He makes His Presence known in our daily lives. How perfect was this one?
Speaking of God-winks, after Jesus left, we were surveying the mess and dreading walking back and forth to the dumpster. Our management company arrived at that moment…almost on cue…saw the mess, and offered to let us use his 4-wheeler with bucket!
Of course you can’t just use it to work (where’s the fun in that???). We had to “test it out”.
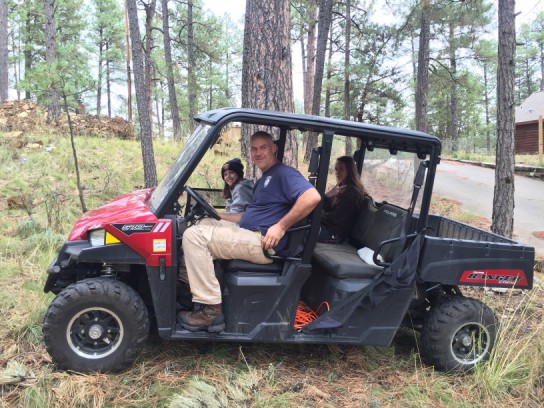
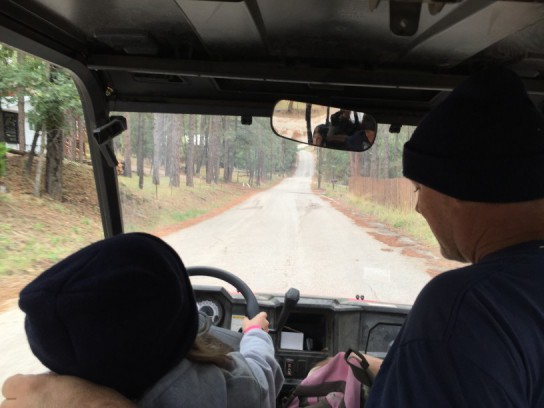

….I think she likes driving it. Her daddy doesn’t appear too excited about it, however.
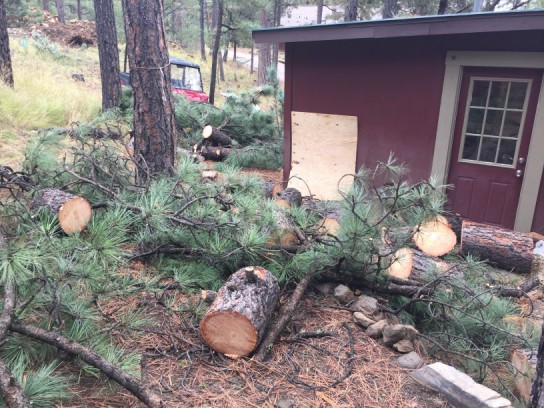
We cleared away the vast majority of the logs and branches, and any more wood and trash using the 4-wheeler. Back to leveling the floor.
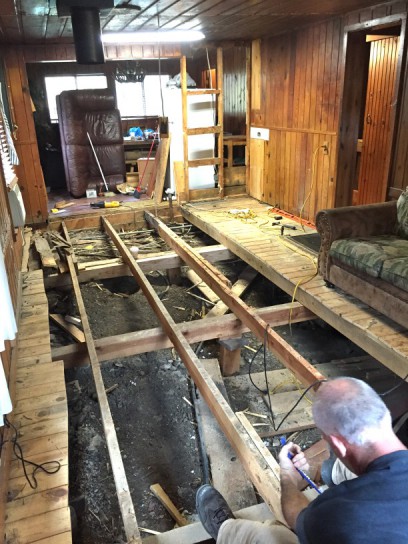
Steve put a bottle jack under the old joists. Using the level tool, he was able to pump the jack enough to raise the floor several inches in each position that he placed it.
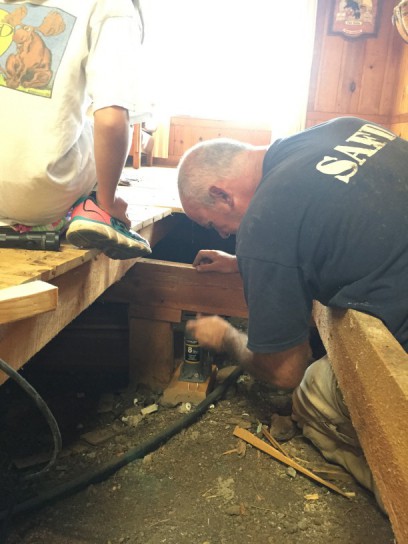
(See the wedge of wood between the vertical pier and the horizontal joist? That’s how much he raised that joist.) With the added wood in place, he’d release the bottle jack, and move it to next needed spot.
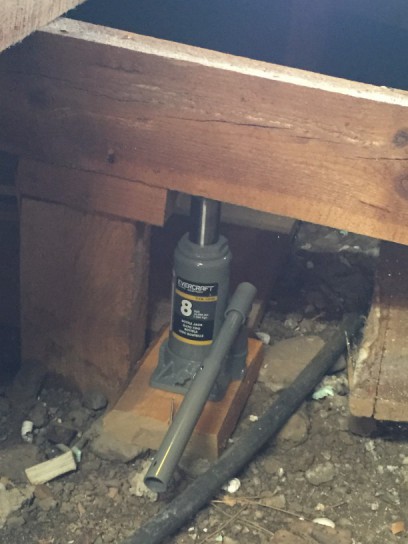
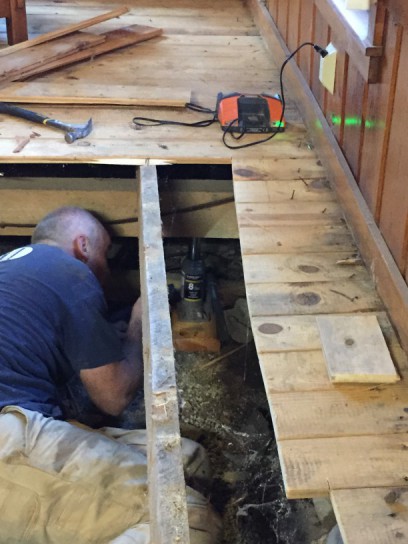
With each pump of the jack, you could literally feel the floor beneath you going up, and if you were looking in the right spot along the wall or floor, you could see it moving.
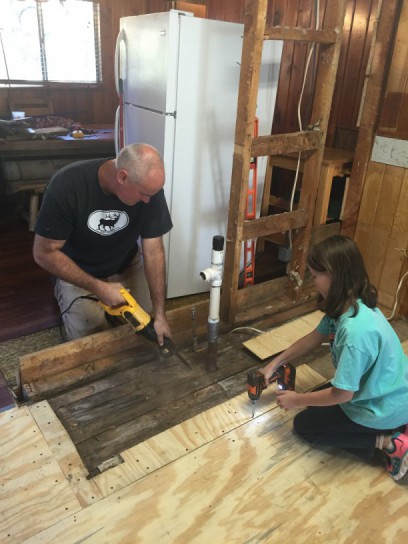
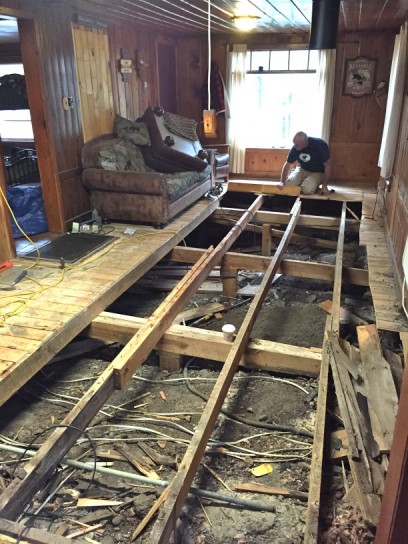
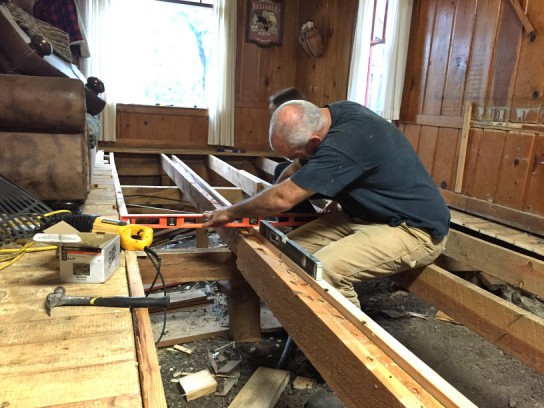
He could only jack it up so far, safely. For the remaining inches that needed lifting, he “scabbed onto” the old floor joists. What does that mean? Using his levels in each direction of the house, he knew exactly where and how high to attach a new joist onto the old, unlevel joists. In these pictures, the whiter board closest to him is being attached to the more yellow, old boards. (WOW! I actually sound like I know what I’m talking about! How about that??) The floor that the couch is sitting on is already level, so it didn’t need to be removed.


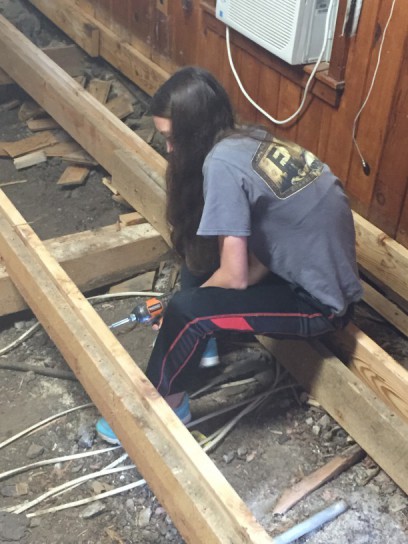
He had the girls drill extra screws every 18” all the way down each new joist. Then it was time to bring in the sheets of plywood decking that the floor boards would be laid on top of.

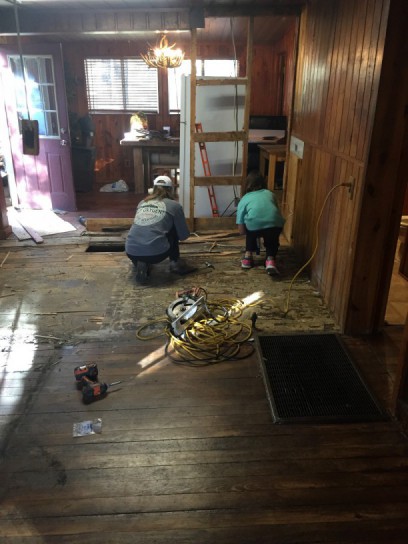
Next up was the dining room floor….the soggy floor with leaky baseboard.
Did I mention the on going and ever-growing MESS?? Just as soon as we’d clear away one, by the next day it was just as bad with more.

For an organizer and cleaner, like I am, you have to know this drove me completely NUTS!!!
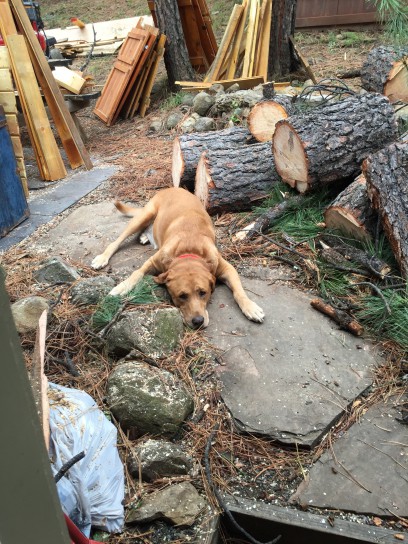
Even our dog was going crazy. No floor inside to lay on, and nothing but nails and wood everywhere he walked outside. Poor guy.
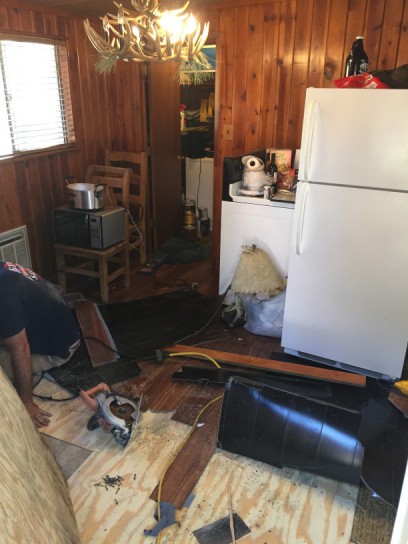
While on the subject of chaos and mess, see the slow-cooker and microwave in the chair, below? That’s how we “cooked”….but not until a 1-1.5 weeks into construction. We had to go out to eat prior to that. Until the floor was replaced and he spent a whole day wiring for the oven, the crockpot and microwave were “it”.
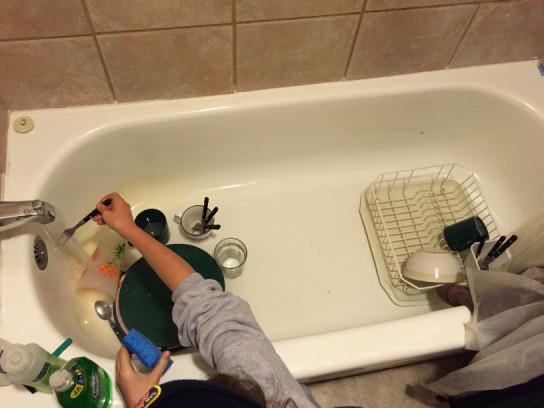
Time to do the dishes!
Uh-oh…no kitchen sink.

For a week or 2, our belongings were scattered all over the house. Steve asked me one morning, “Where’s the coffee?”
I said, “On the dining room floor.” (cuz that made sense)
“Where are the spoons?”
“On the fridge.”
“Where are the forks?”
“In the Master bedroom.”
Reiley wanted to shower one night and complained, “Ugh…I want to take a shower, but all the dishes are in there. I don’t feel like washing them right now.” (Had to laugh out loud just to hear her say that…)
Steve asked, “Where’s the tv?”
“In the hallway.”
“Where’s the coffee table?”
“Under the dining room table.”
”Where are the glasses?”
“In the laundry room.”
“Has anyone seen the dog?”
“He’s hiding from all the chaos”…..
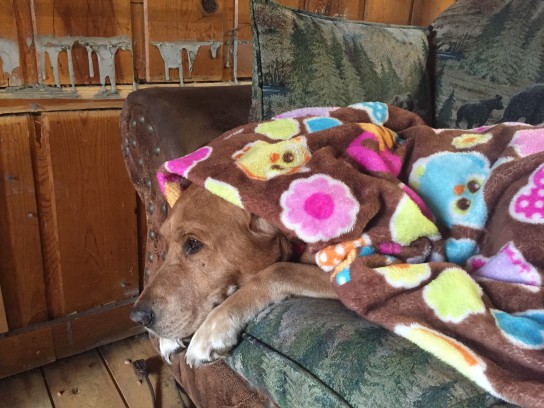
You can almost hear him thinking, “Just tell me when it’s all over…”
You get the idea.
Floor installation was next! Finally!! See that trailer full of wood? OH BOY!! It was MY job to carry ALL of that UPSTAIRS! (You’re jealous, aren’t ya?) I carried 2 boards at a time…
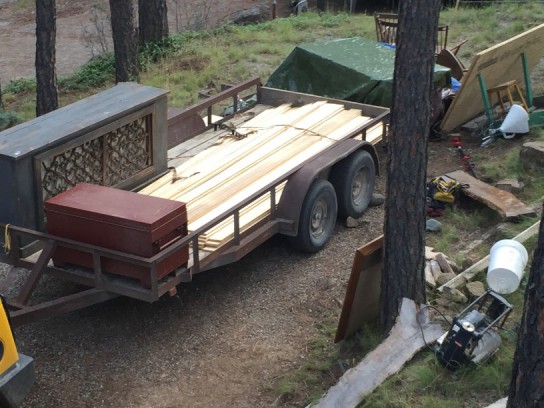
….up those stairs….
….AND up that dirt hill, AND around the corner to the back porch….(at 7000 feet altitude…gasp…sputter…choke choke…)…OVER and OVER again! I lost count at 20 trips.
Reiley then cut each board and passed off to Steve and Reese….

….who then screwed them into place.
Steve and I then put on several coats of sealer. Done.

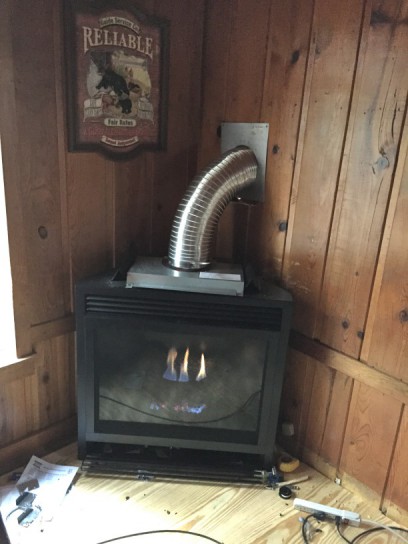
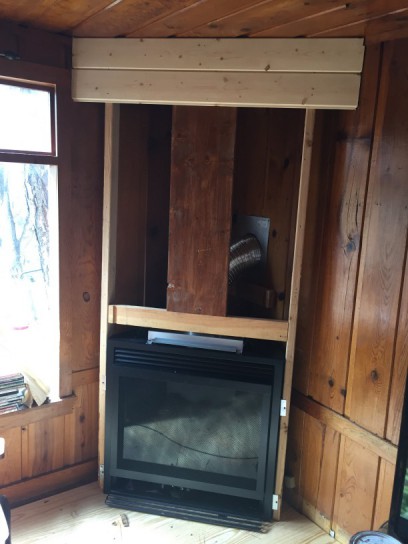
Then Steve installed a gas fireplace. (Took him only a few hours one day.)
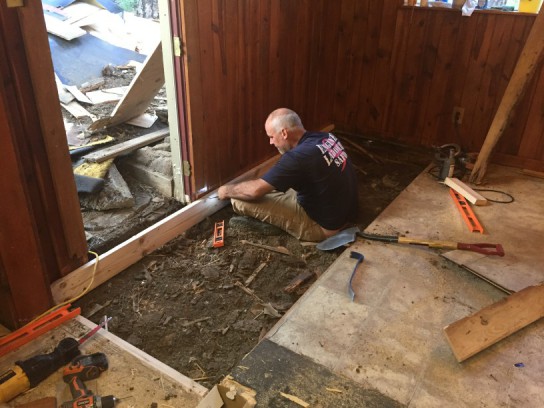
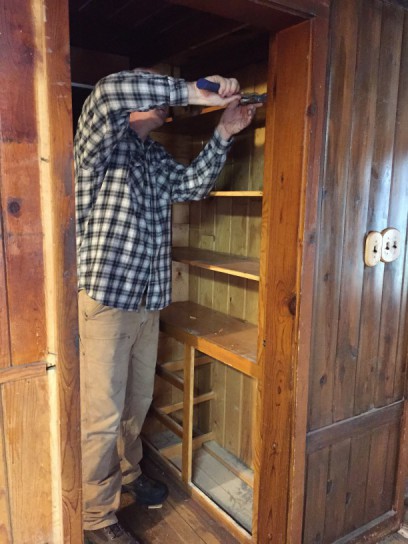
We also ripped out a useless storage area in the hallway, cut a new door for the kids’ bedroom in its place, and walled off the existing kids’ bedroom door, in order to fit a couch on that living room wall for more seating.
Here was the existing door…
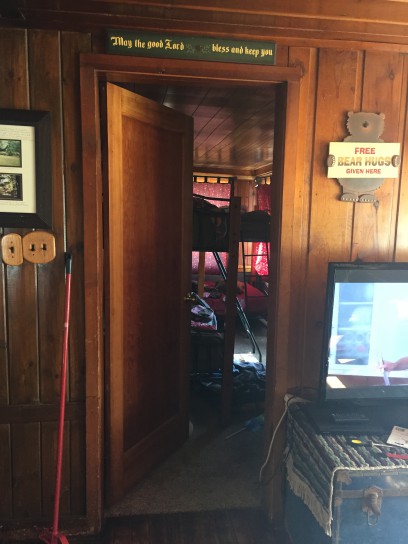
Here was the hall storage closet on the right wall of the hall. (See the open door and open drawer? I opened them so you could see it better.)
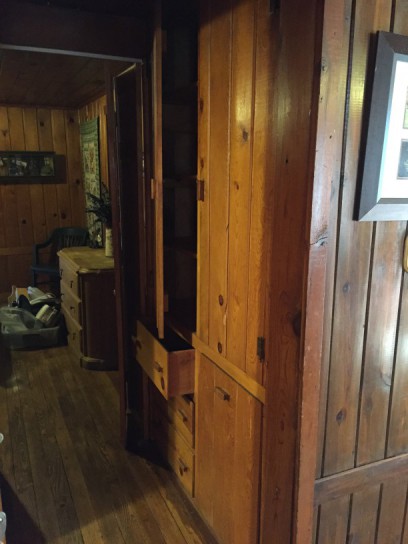
We took all of that OUT…..

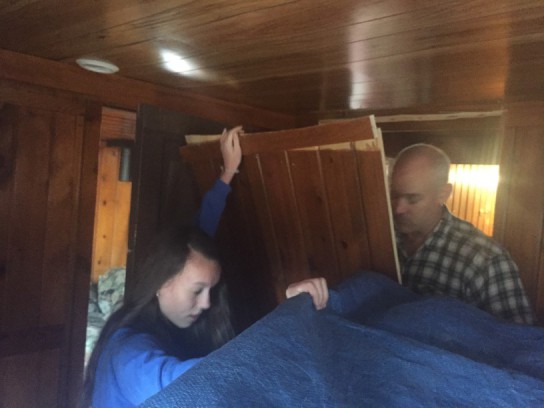
Reiley helping him pull it down. That’s the kids’ bedroom. The old door is behind her. This will be the new door.
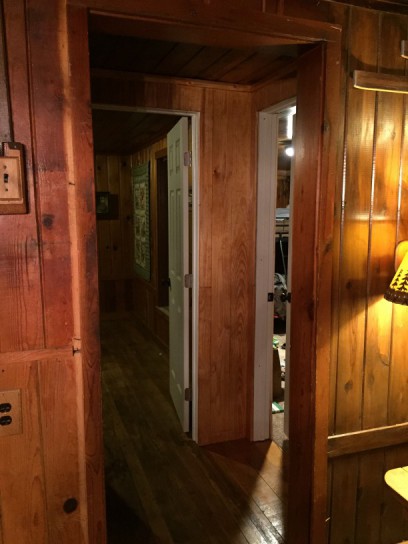
There it is! New door. I’ll paint next trip.
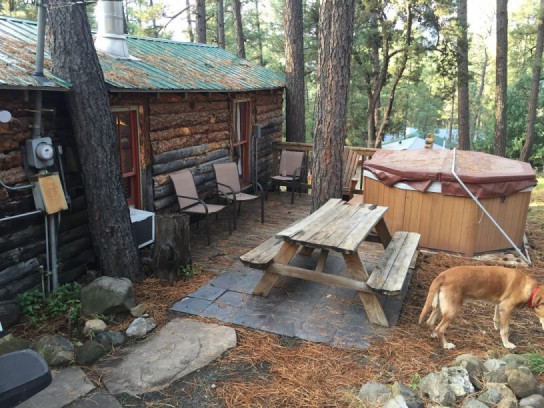
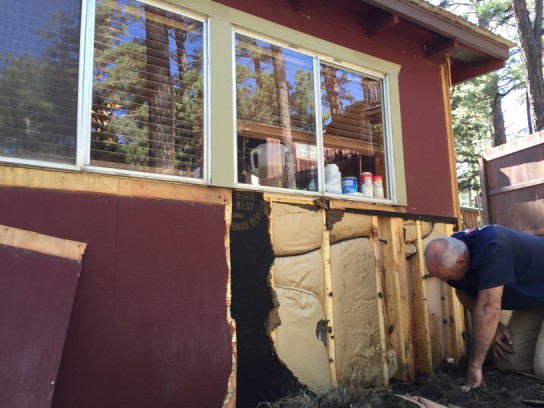
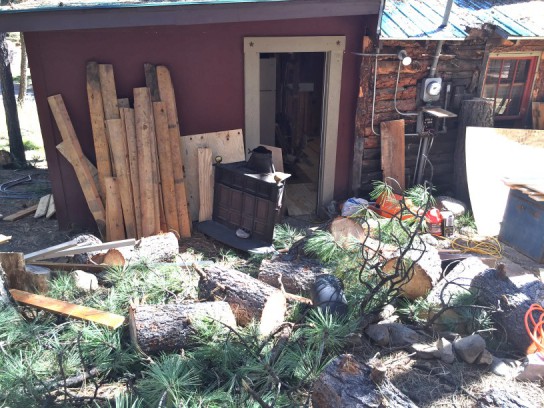
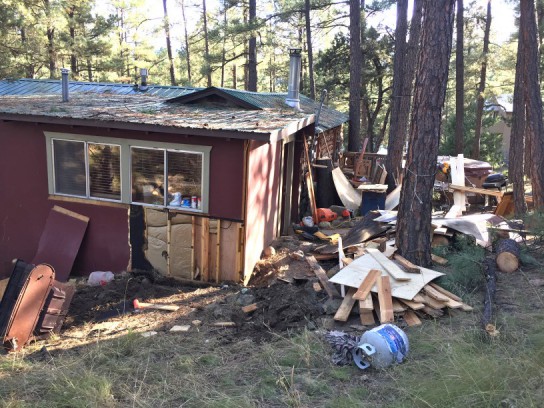
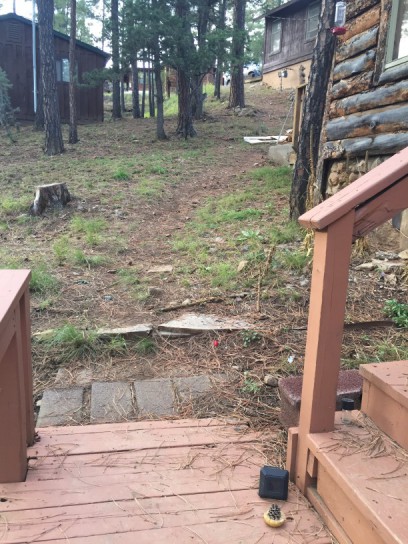
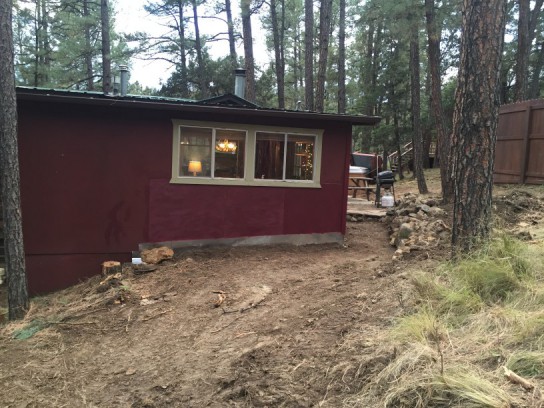
Other than finishing up construction inside the cabin, the last biggie was clearing over a foot of soil from around the back corner of the cabin, to protect the siding. We also had to build a bigger, better rock retaining wall. This picture was taken “before” we started all the digging and getting additional rocks.
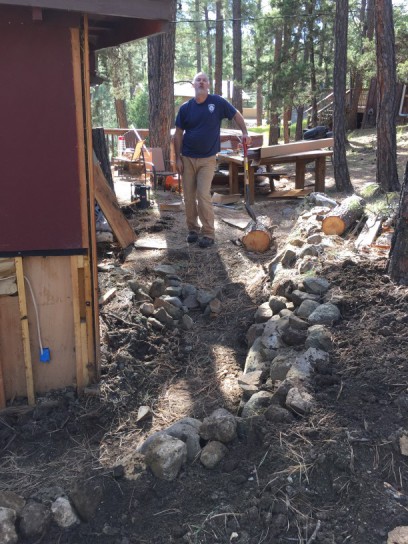
Normally we’d have to buy rocks. And normally we’d have a lot of shovel digging to do. BUT…not with God as a Foreman. Ready for another God-wink?? (I am!)
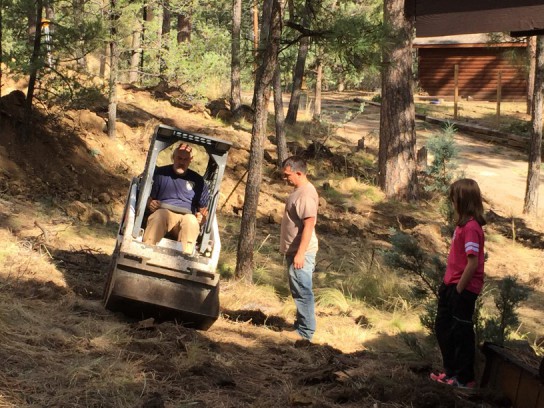
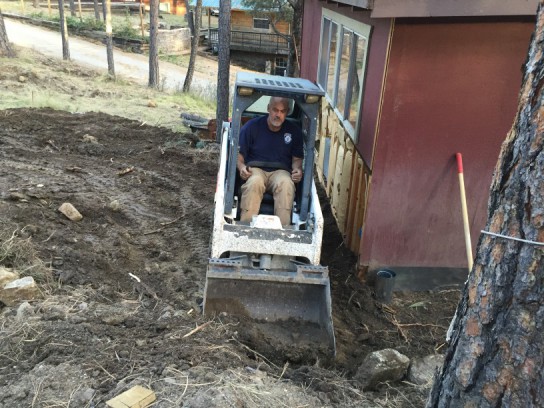
We go to our cabin several times a year, every year. There’s another cabin across the street. Rarely is that cabin owner there when we are. He lives out of town, like we do. A year ago he bought the land behind us. Until now, he hasn’t done anything with it. But, during our first week or two of this trip, there was heavy equipment sitting on that land…but the workers never showed up. It was God’s perfect timing that when we got to the point that we had to dedicate time outside to finishing the siding and retaining wall, the workers showed up and dug up zillions of huge rocks. Then, our neighbor came for the weekend, and offered the rocks to us, for free! He then saw us digging tons of soil with our shovels and offered us his Bobcat! We used it all day, moving far more dirt than we ever could have digging…and were able to get very large boulders that were too hard to carry.
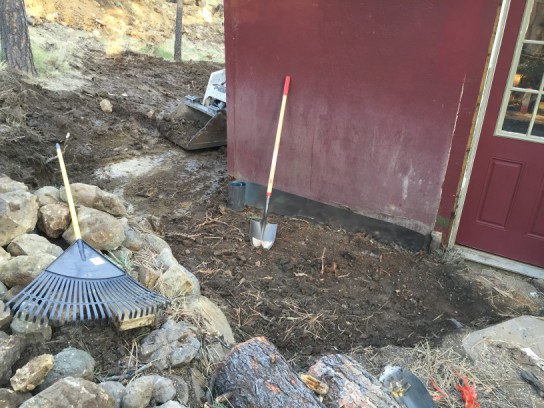
We still had to hand-dig the soil by the back door. The bobcat couldn’t squeeze in there.
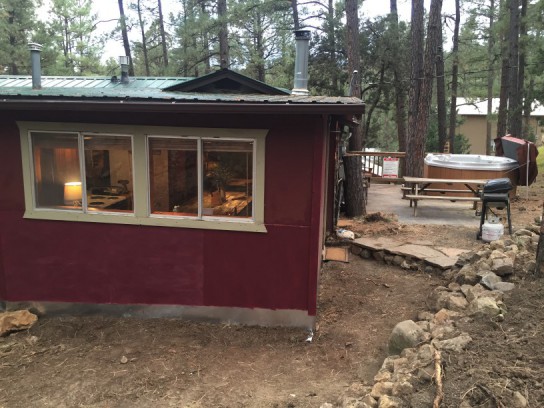
He replaced the siding and I painted it. It’s temporary. This Spring we’ll cover all of the siding with split logs to match the front.
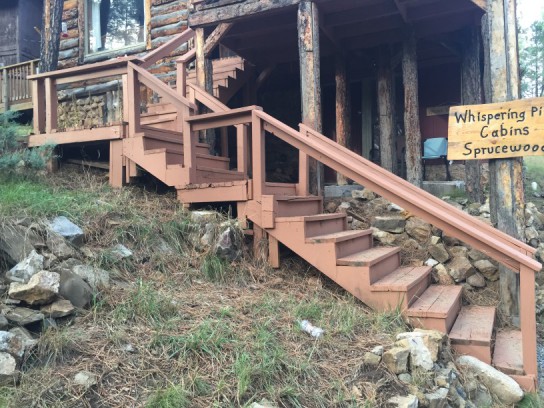
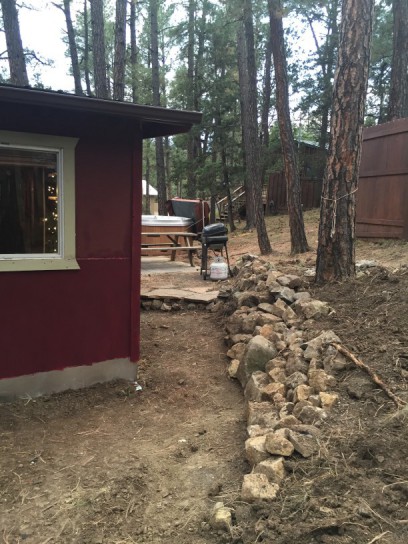
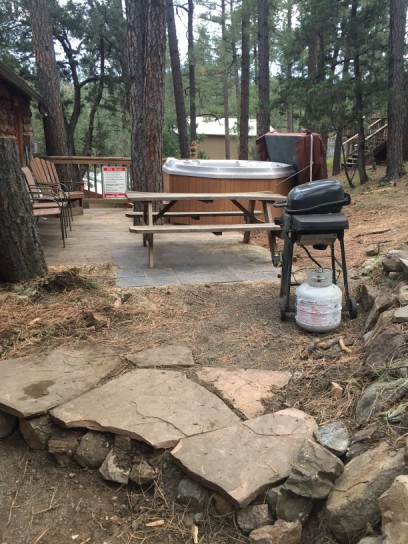
See how much wider the path is now? How much dirt was removed…and how many more rocks there are on the wall? There’s even a step now!
Look! The back porch is All clean!! (No small task, I assure you.)
Many more details took place to complete the inside, but I’ll skip to the final reveal.
Here was “Before”….
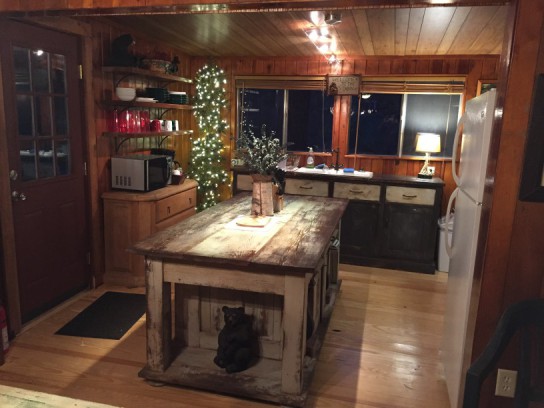
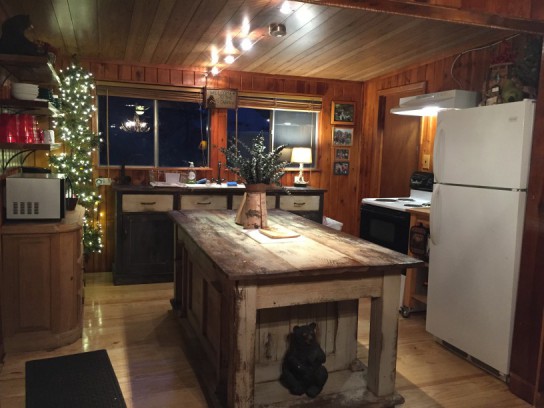
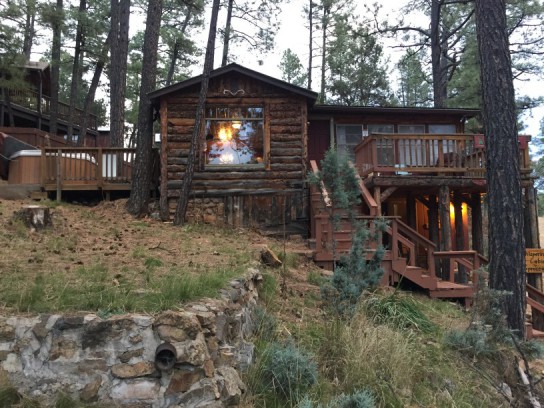
Here’s “after”…. (a little different, eh?)

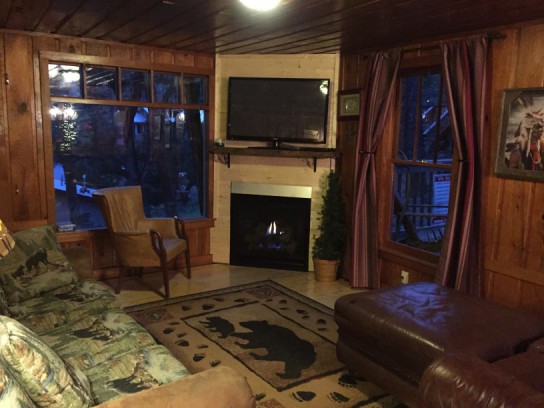
The look at night.
Before…
After….

Before…

after…
Before…
After…
Before….
After…
The couch wall “BEFORE”….
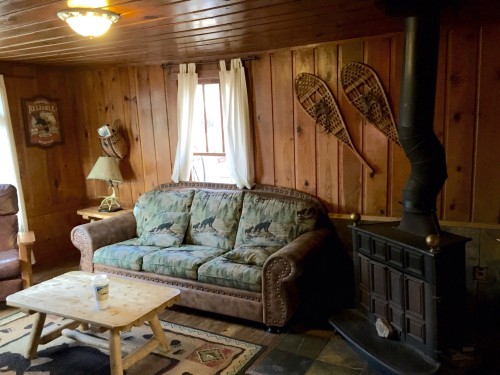
The same couch wall now….
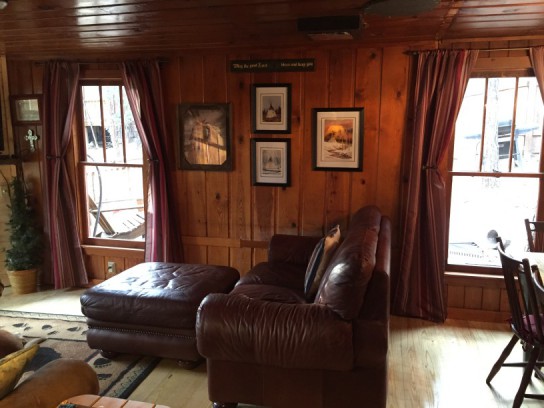
This was the old tv wall with the kids bedroom door on it. Remember, we walled in that door.

 I put some stain on those old shabby chairs, painted the table, and hung old pictures of Ruidoso from 1930’s til 1950’s on the wall.
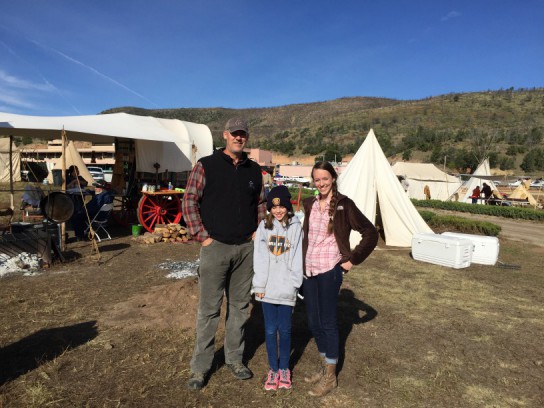
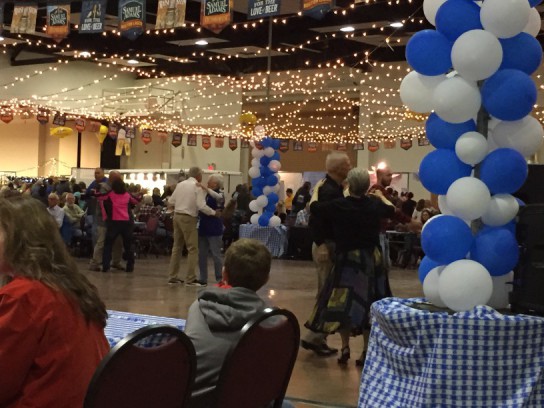
It hasn’t all been work with no play. We went to the annual Cowboy Symposium chuckwagon festival, and Oktoberfest to hear the German music and eat German food.


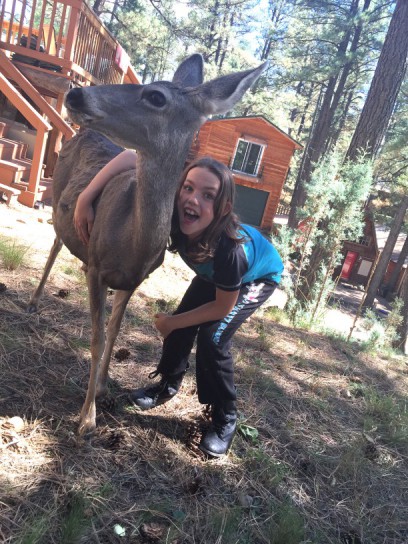
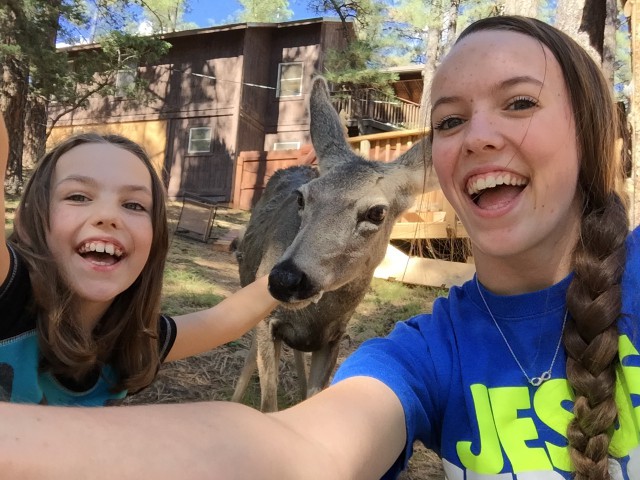
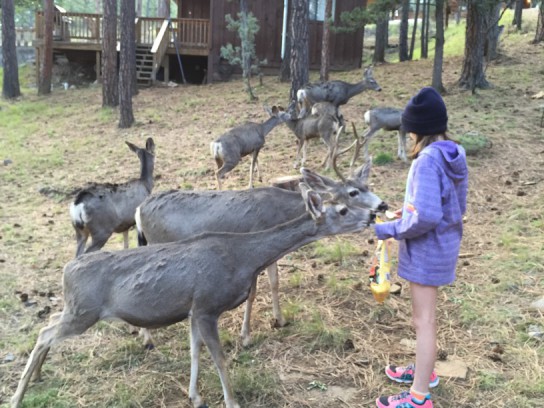
We also got daily visitations from friendly critters who were all too happy to let us feed them and pose for pictures. Our friends the deer and elk…


Next time we come in the Spring we plan to re-do the downstairs bedroom and bath, the upstairs bathroom, replace the outer logs with newer ones, and cover the siding with cut logs, too. Sprucewood Cabin’s make-over will continue.

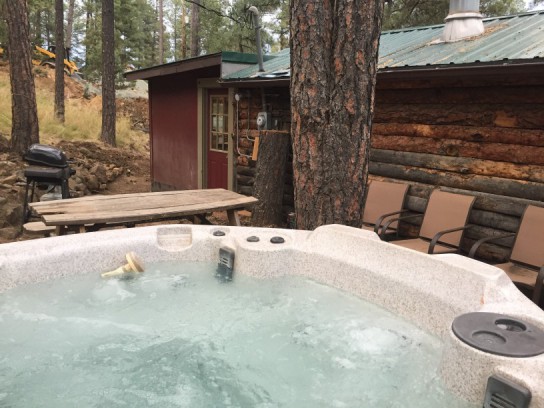
If you ever want to stay there, contact our management company, Whispering Pine Cabin Rentals (www.wpcr.com), and request the Bradbury’s Sprucewood cabin. It’s 3 bedroom, 2 bath, hot tub, etc.
We were gone 3.5 weeks total. In the 3 days we’ve been home, we’ve tortured our cat…


….went to a Halloween party at my sister’s house…

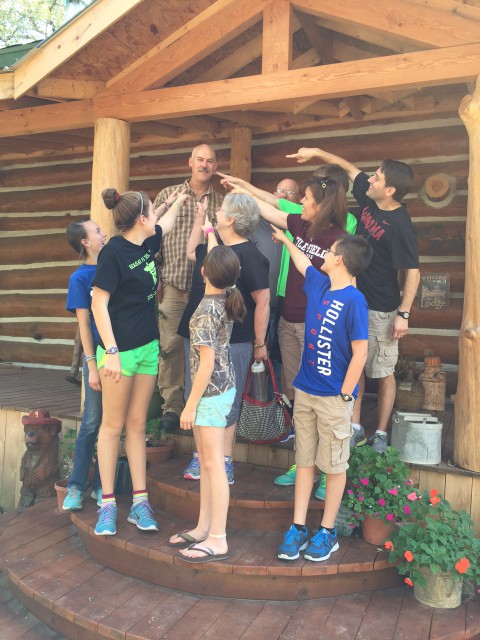
….and opened our home to good friends and their visiting parents from Alabama for lunch on Sunday. (They’re pointing at Steve’s new mustache.)
If you’re new to this blog, it’s a chronological story, like a book. I suggest you start with the post called “What is Cottonwood Creek?” which explains this blog better, and has direct links to all of our posts.
Stay tuned for more updates! You never know what the Bradburys will be up to next!

Hi!! So great to hear from you! We have gone into your shop many times in past year or 2, but each time you guys were off and at home. :(. Oh well. Hope to see you soon!
LikeLike
Hi guys!! Knew we haven’t seen y’all in a few years and now I know why…You guys have been BUSY!!! Do you rent yourselves out? Y’all make a great team!! Congrats on the completion of your cottonwood cabin and the beautiful renovation to your Ruidoso cabin!! Hope to see you all soon! Mark and Barbra, Twobears Trading Post
LikeLike
OH MY GOSH!!!! I knew what you were doing but these pictures made me realize how much it involved! Loved seeing it, one minute wishing I was there, next minute very glad I wasn’t!! I am so proud of you four! Can’t wait to see it in person!
Rejoice in the Lord always, and again I say, Rejoice. Philip. 4:4
LikeLike